Full-Screen & Wireless CarPlay — VW Touareg Self-Install
Full-screen CarPlay and native wireless on your Touareg, done yourself with a USB drive. There are two parts — a firmware update (only if your car needs it), then the feature activation — followed by a quick wireless setup.
Three stages — the first one is often skipped
Read this once so the order makes sense before you start.
Four rules for preparing the USB
Both Part 1 and Part 2 load from a USB drive. Almost every hiccup traces back to one of these — get them right and the rest is quick.
Step-by-step, for your computer
- Right-click the USB drive → Format → choose FAT32 → Start.
Drive bigger than 32 GB? Use Rufus or Raspberry Pi Imager to format FAT32. - Extract the package we sent with 7-Zip (right-click → 7-Zip → Extract Here). Not the built-in Windows extractor.
- Copy the extracted Data and Meta folders to the root of the USB drive.
- Check the root shows exactly Data and Meta — nothing else. Safely eject.
- Open Applications → Utilities → Disk Utility and format the drive to FAT32 (MS-DOS FAT).
Drive bigger than 32 GB? Use Raspberry Pi Imager (OS: Erase → FAT32). - Extract the package with 7-Zip / Keka — not the built-in Archive Utility.
- Copy the Data and Meta folders to the root of the drive.
- Remove Apple's hidden files before you eject — the car rejects them. In Terminal run: dot_clean -m /Volumes/YOUR_USB_NAME (Replace YOUR_USB_NAME with the drive's name. Or use BlueHarvest, free 30-day trial, to clean it.)
- Eject the drive.
macOS quietly adds files like .DS_Store and ._ copies the car can't read. The dot_clean -m command (or BlueHarvest) removes them so the drive works first time.
Before you start
- A USB drive, 8–32 GB, ideally new/empty (SD card also fine if your car has the slot)
- A Windows or Mac computer with internet
- 7-Zip installed from 7-zip.org (free)
- The download links and activation code we email you after purchase
- Your car parked where you can sit with it for ~30–45 minutes, ignition on
- Your phone to hand, for the wireless CarPlay pairing at the end
Updates take several minutes. Keep the car in ignition-on / accessory (or engine running) so it doesn't go to sleep partway through.
Firmware update
Your car may already be up to date. Send us a photo of your version screen and we'll tell you whether you need this part — if not, skip straight to Part 2.
Check your firmware version.
Open the software version screen in the car and take a photo of the Installed SW MU version. Send it to us and we'll tell you whether your car needs this firmware update or can skip straight to Part 2.
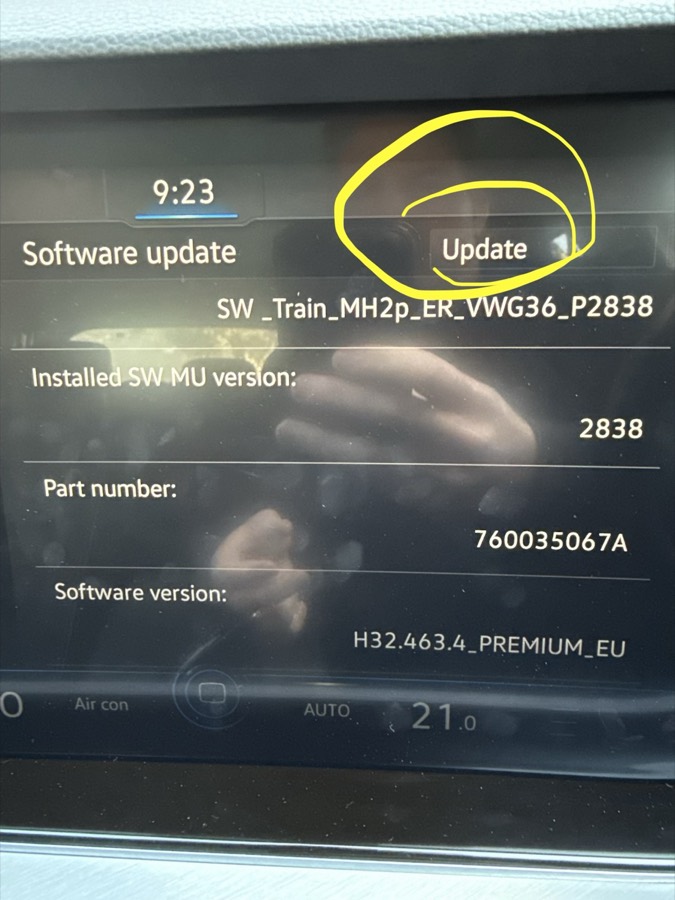
The version screen — this is the Installed SW MU version. Send us a photo of yours and we'll confirm whether the firmware update is needed. Prepare the firmware USB.
Following the four USB rules above: format to FAT32, extract the firmware package (about 4 GB) with 7-Zip, and copy the Data and Meta folders to the drive.
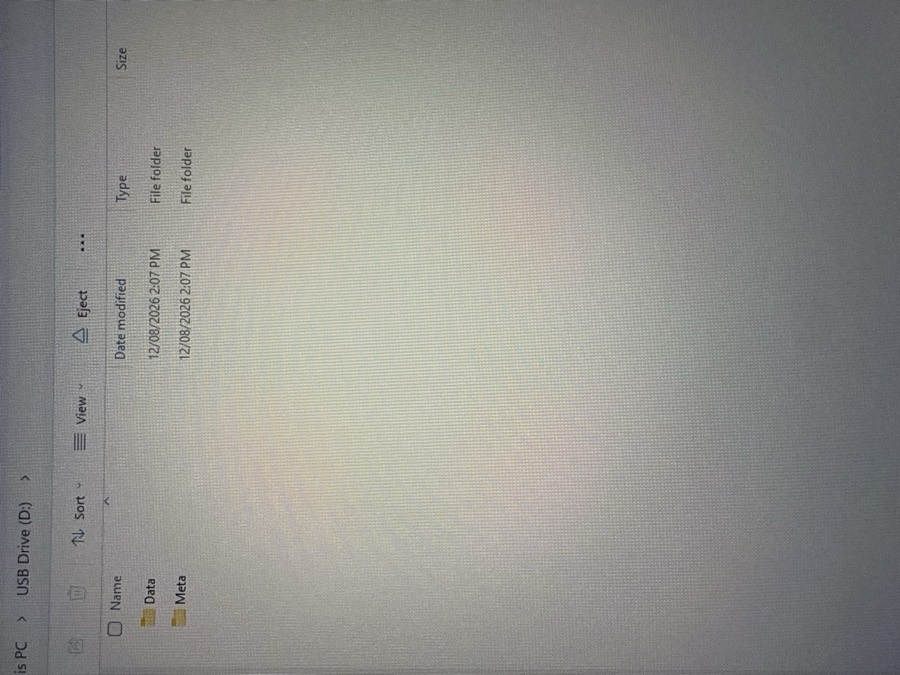
Correct result: exactly two folders — Data and Meta — at the top level of the drive. ! Most common mistakeIf the car can't read the USB, 9 times out of 10 the files were extracted with the built-in tool. Re-extract with 7-Zip onto a freshly formatted FAT32 drive.
Insert the USB and open the service menu.
With the ignition on, plug the drive into the front USB port, then open the car's service / software menu. We'll guide you into it — you're looking for Software update / versions.
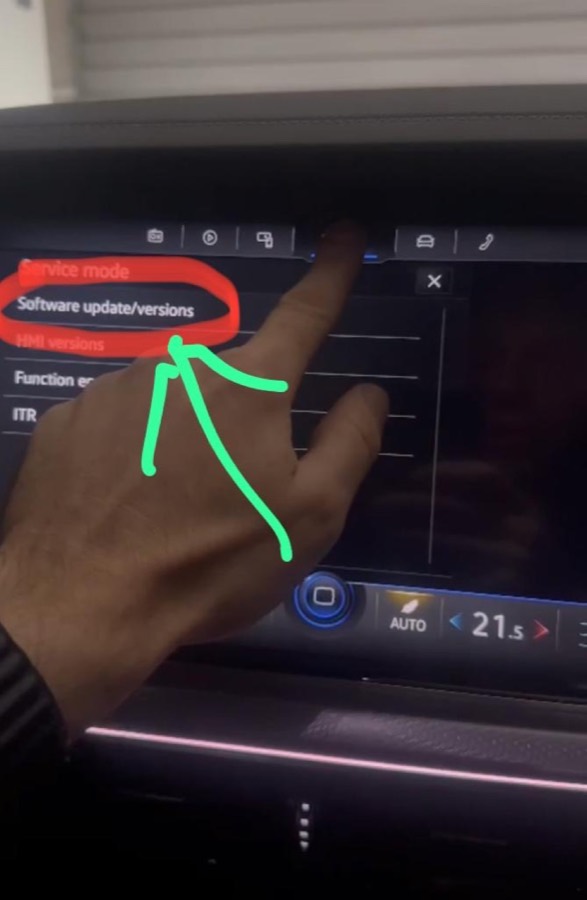
Service menu → Software update / versions. The firmware update is started from here. Run the update and wait.
Start the update from the menu. The screen may go black and restart partway through — that's normal. Don't remove the drive or switch off.
Wait for the firmware update to finish.
When it's done the unit restarts on its own. Firmware is now done — move on to Part 2.
Feature activation
This is the install that switches on full whole-screen CarPlay and Android Auto. Prepare the USB the same way as Part 1 — but this package does not need 7-Zip.
Prepare the activation USB — no 7-Zip needed.
Fresh FAT32 drive, then copy the contents of the auto-update package to the root of the drive. Unlike the firmware, this one is ready to use — no extracting.
Auto-update packagecarsoft.co.nz/dl/setup.zip — try this one first.
Try the auto-update first — just insert the USB.
With the ignition on, plug the drive into the front USB port. On most cars the update starts by itself — let it run to the "install complete" screen.
Didn't auto-start? Switch to the engineering package.
Some cars won't auto-start. If you see one of these screens — "No auto update possible — insert only one medium" or "The software update failed — please try again" — that is not a fault, it just means this car needs the engineering method.
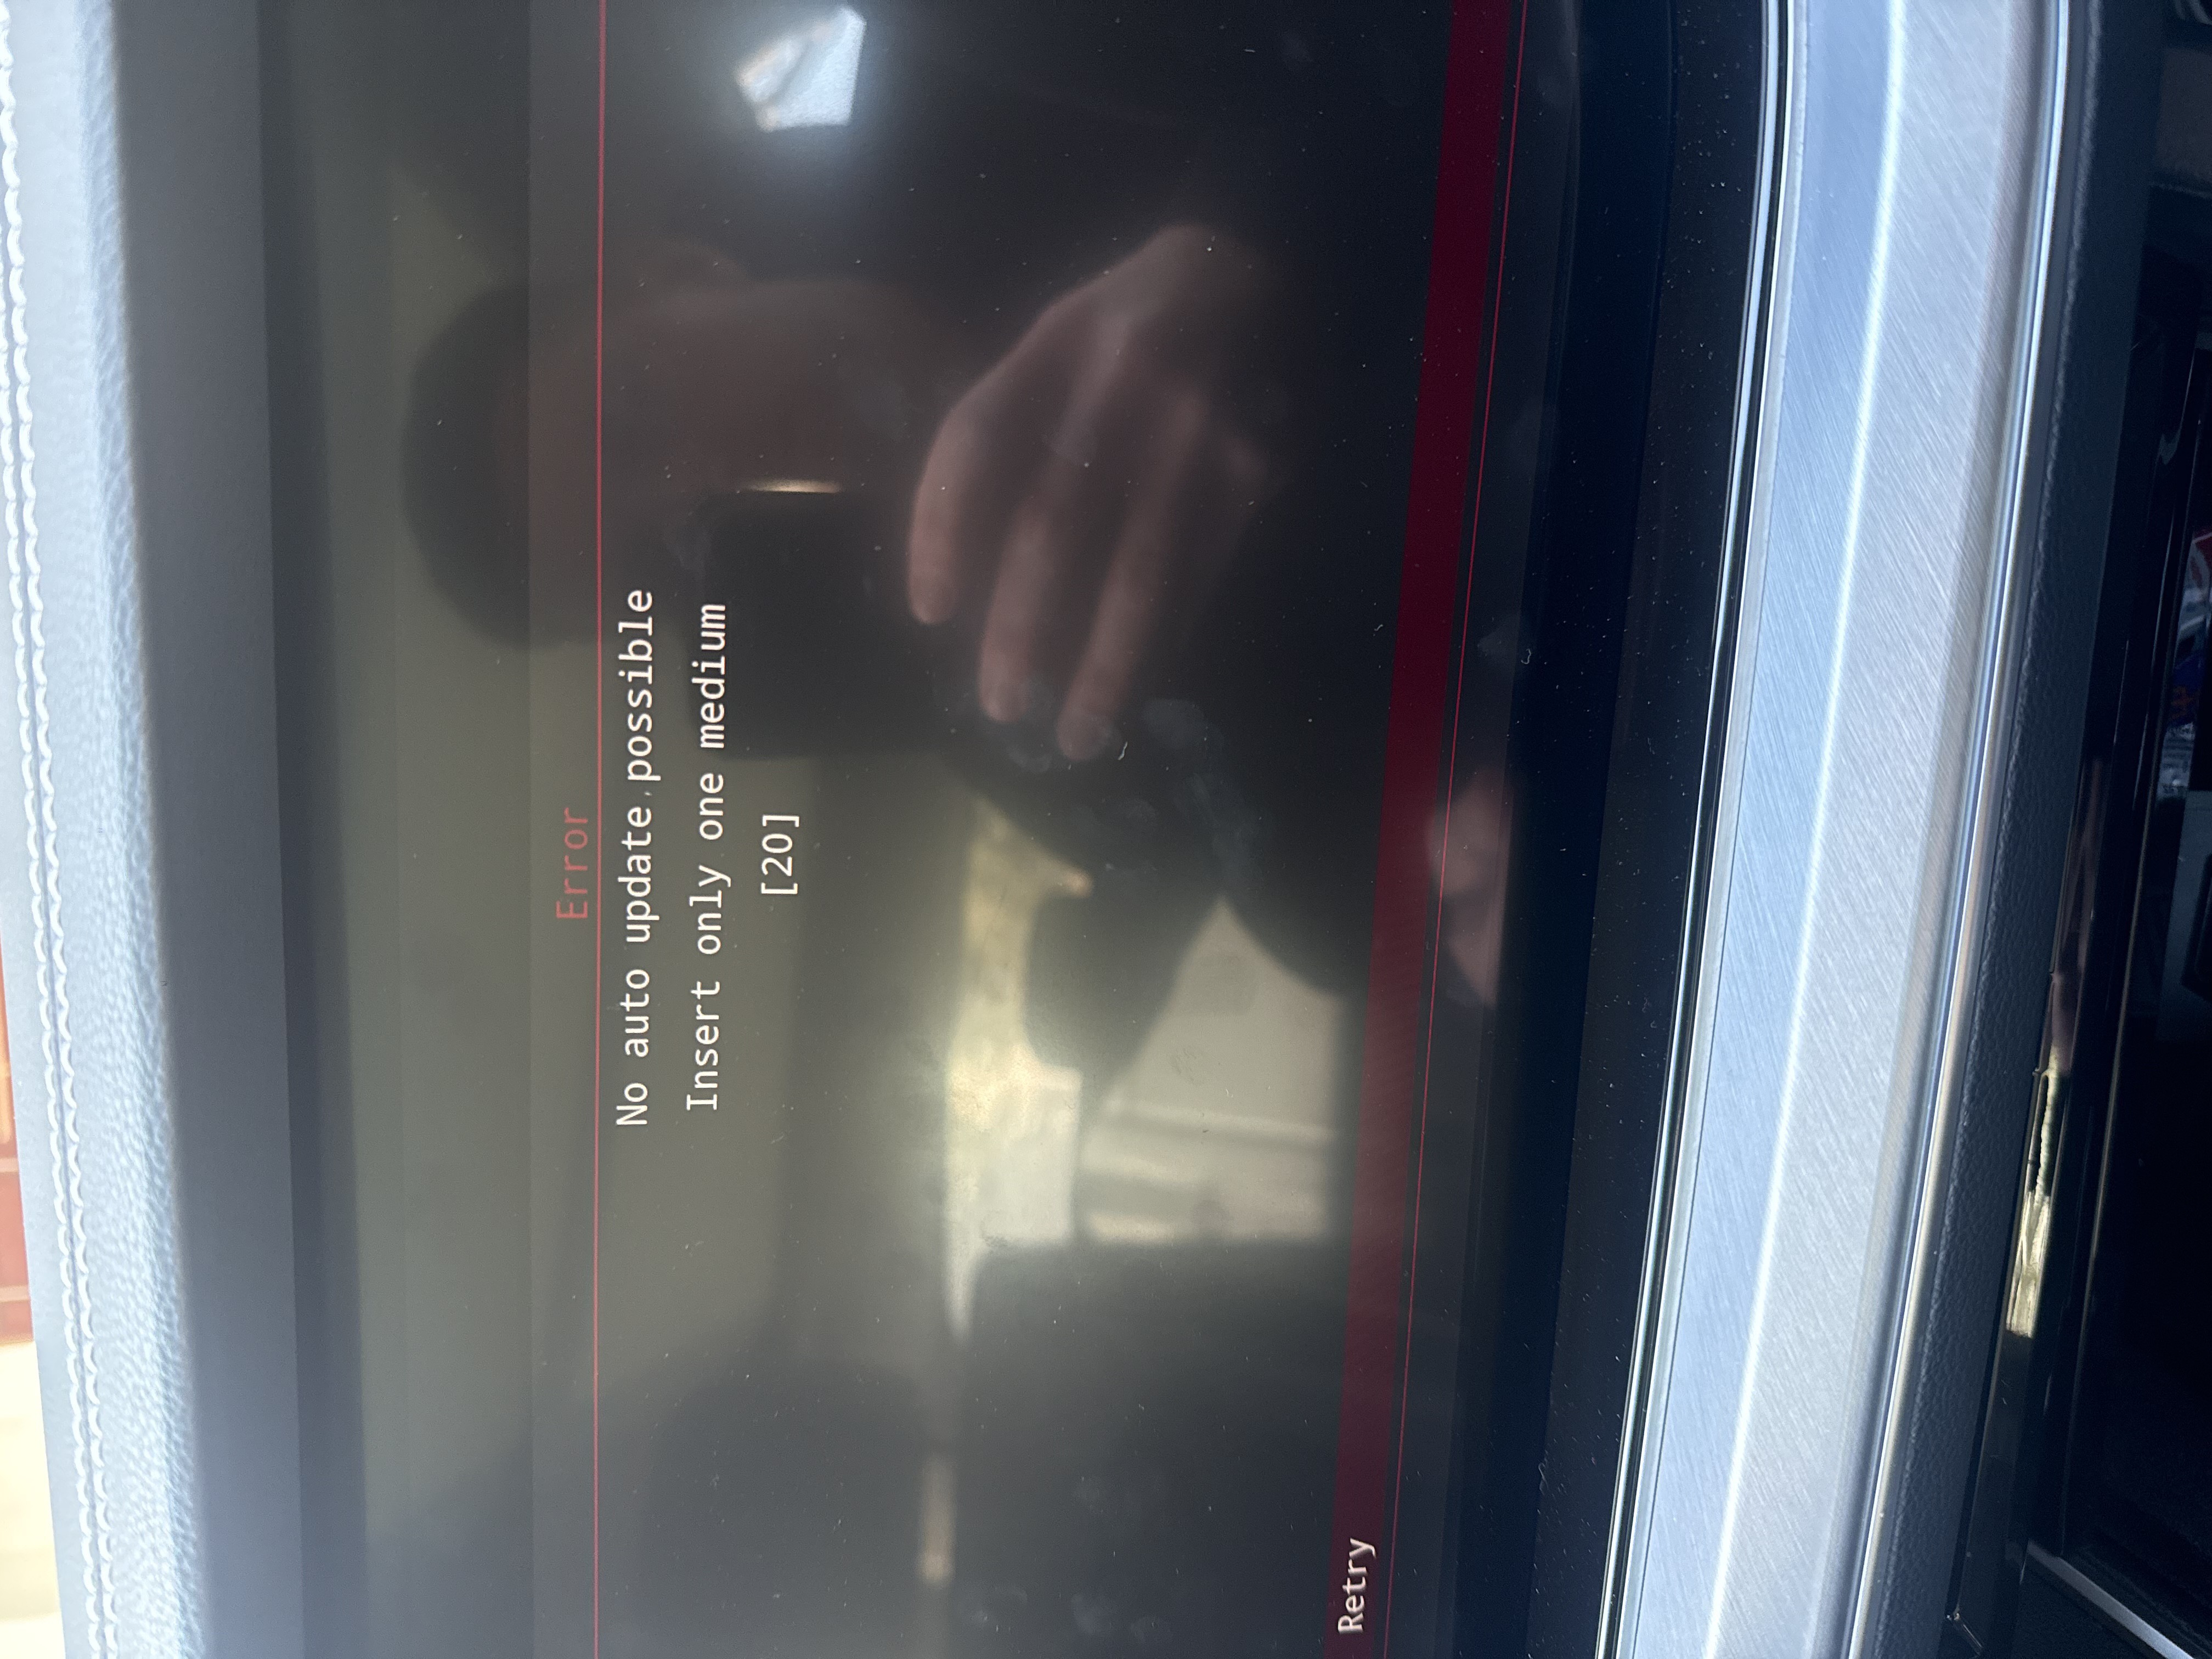
“No auto update possible” — this car needs the engineering package instead. 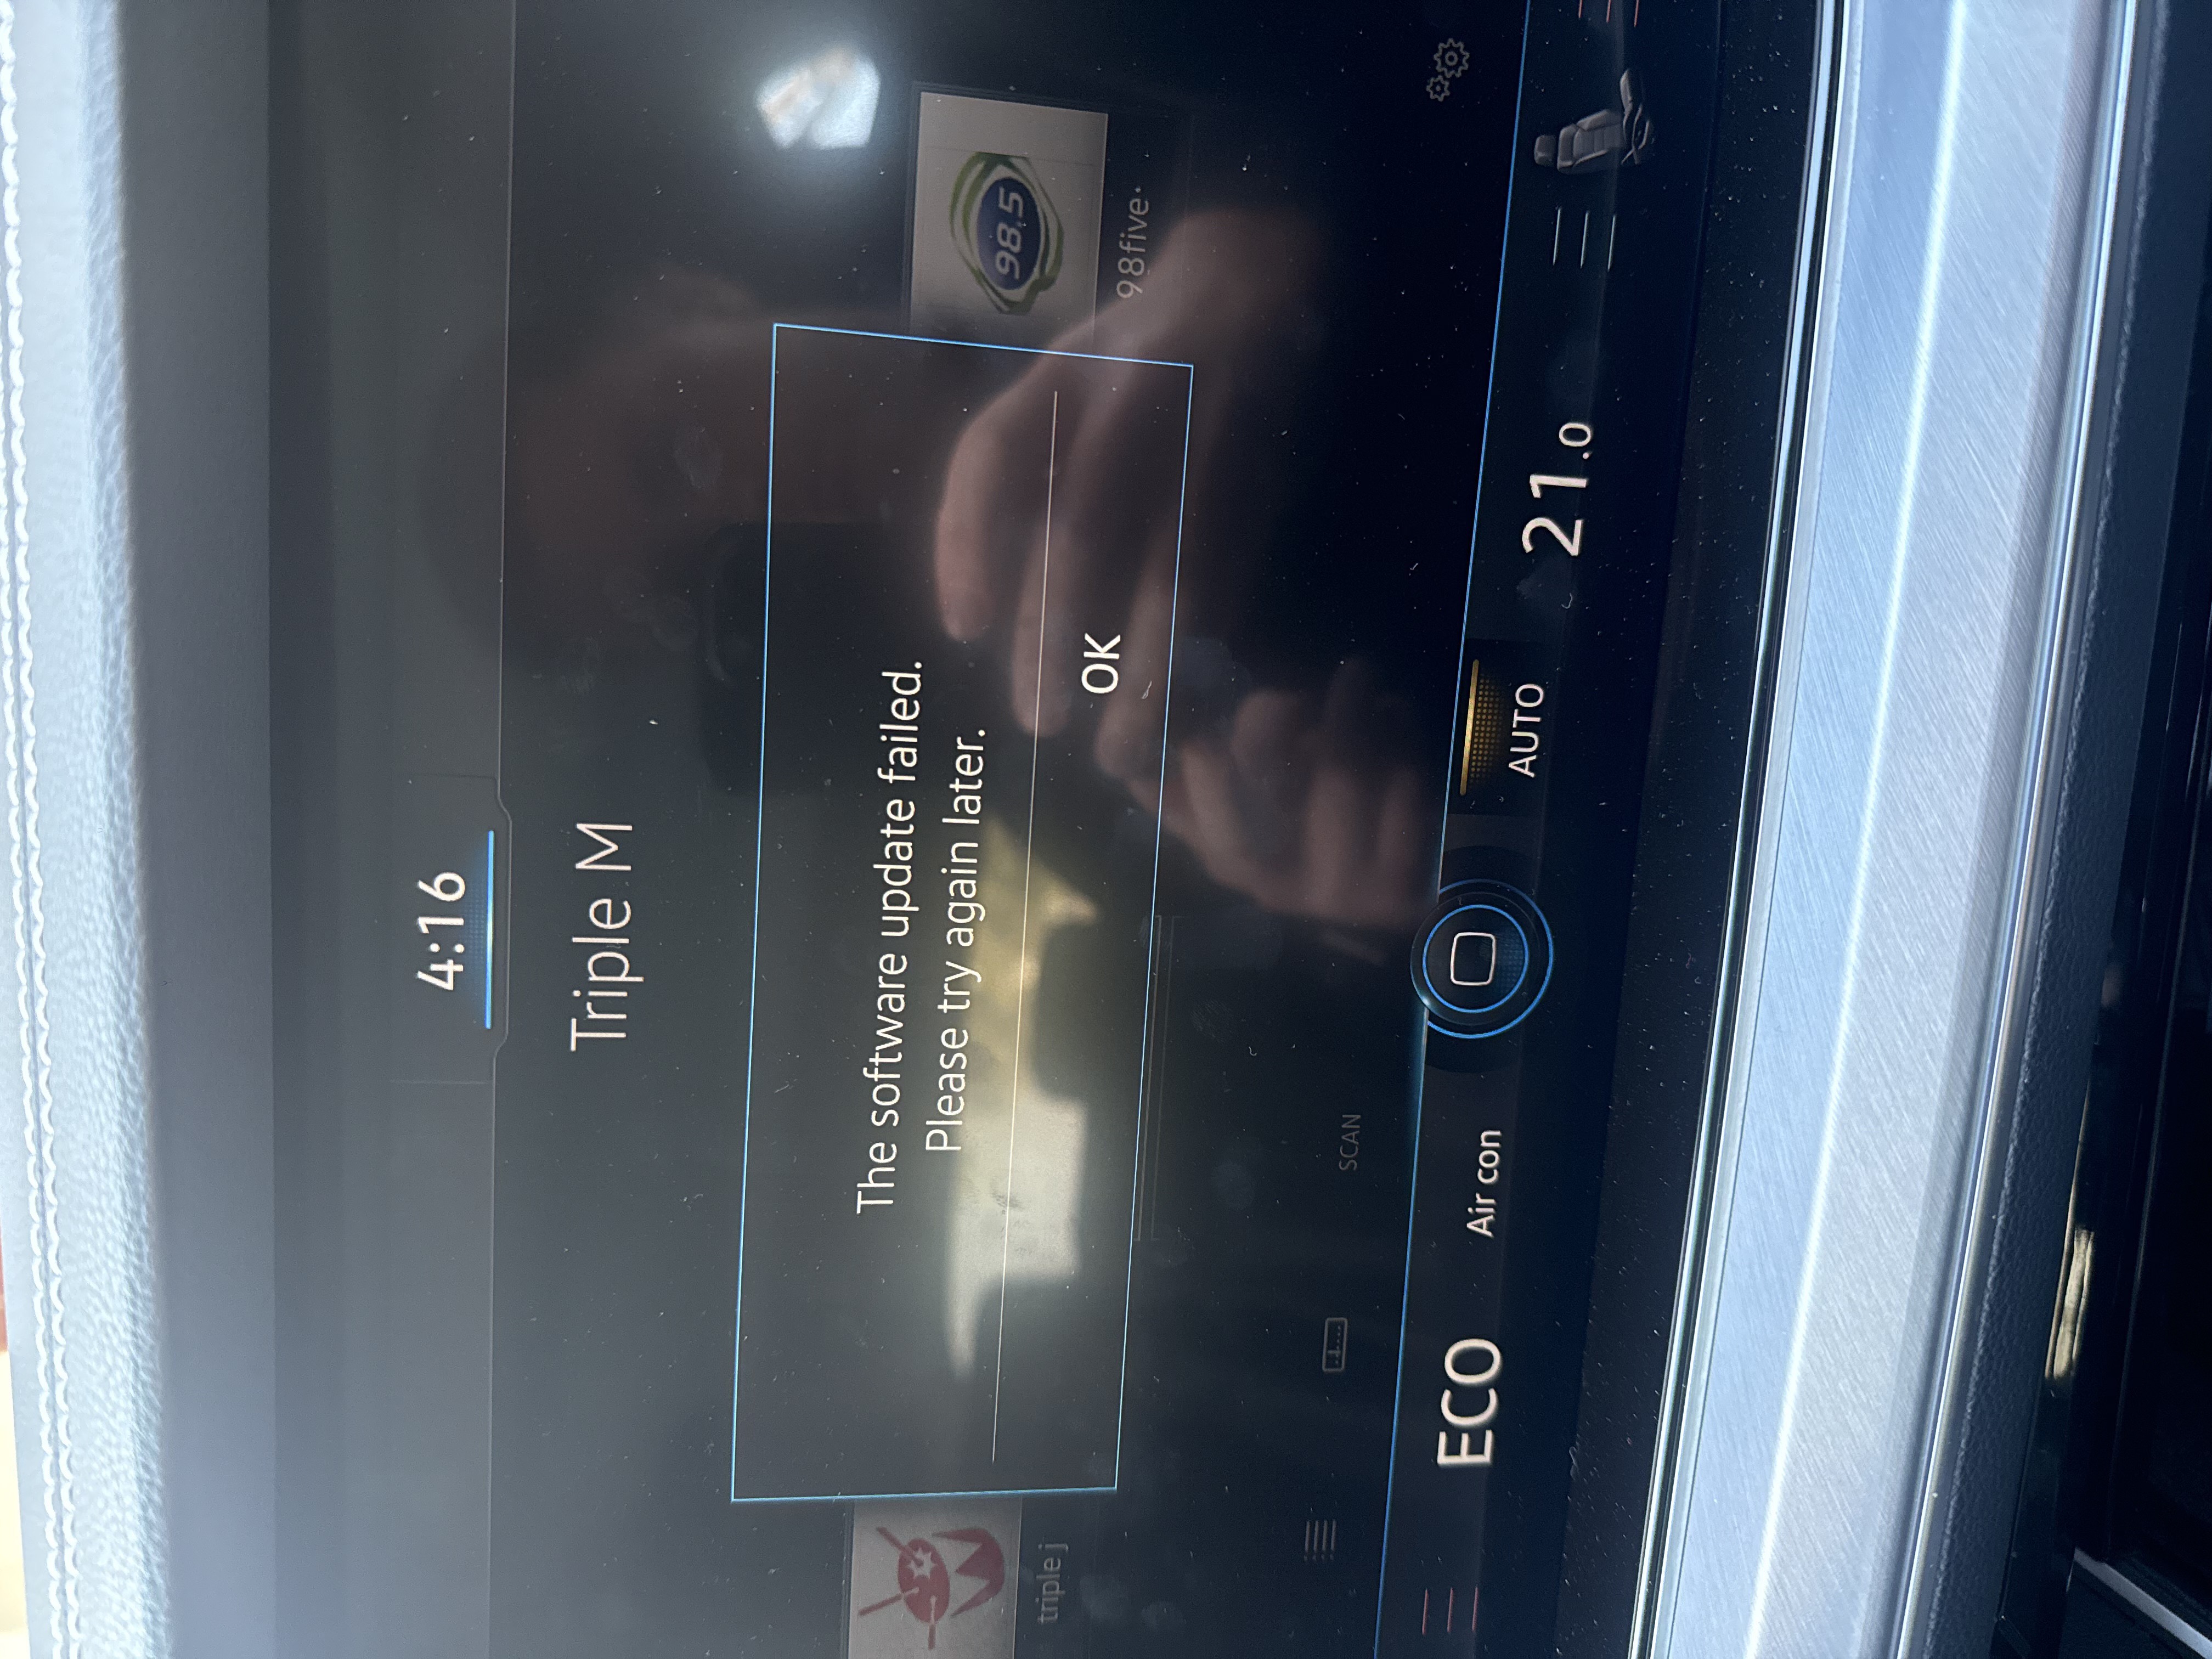
Or “The software update failed” — same thing: use the engineering method. Put the engineering package on a fresh FAT32 USB (no 7-Zip) and run it from the car's engineering menu: enter engineering mode, then choose Update.
Engineering package (only if auto-update won't start)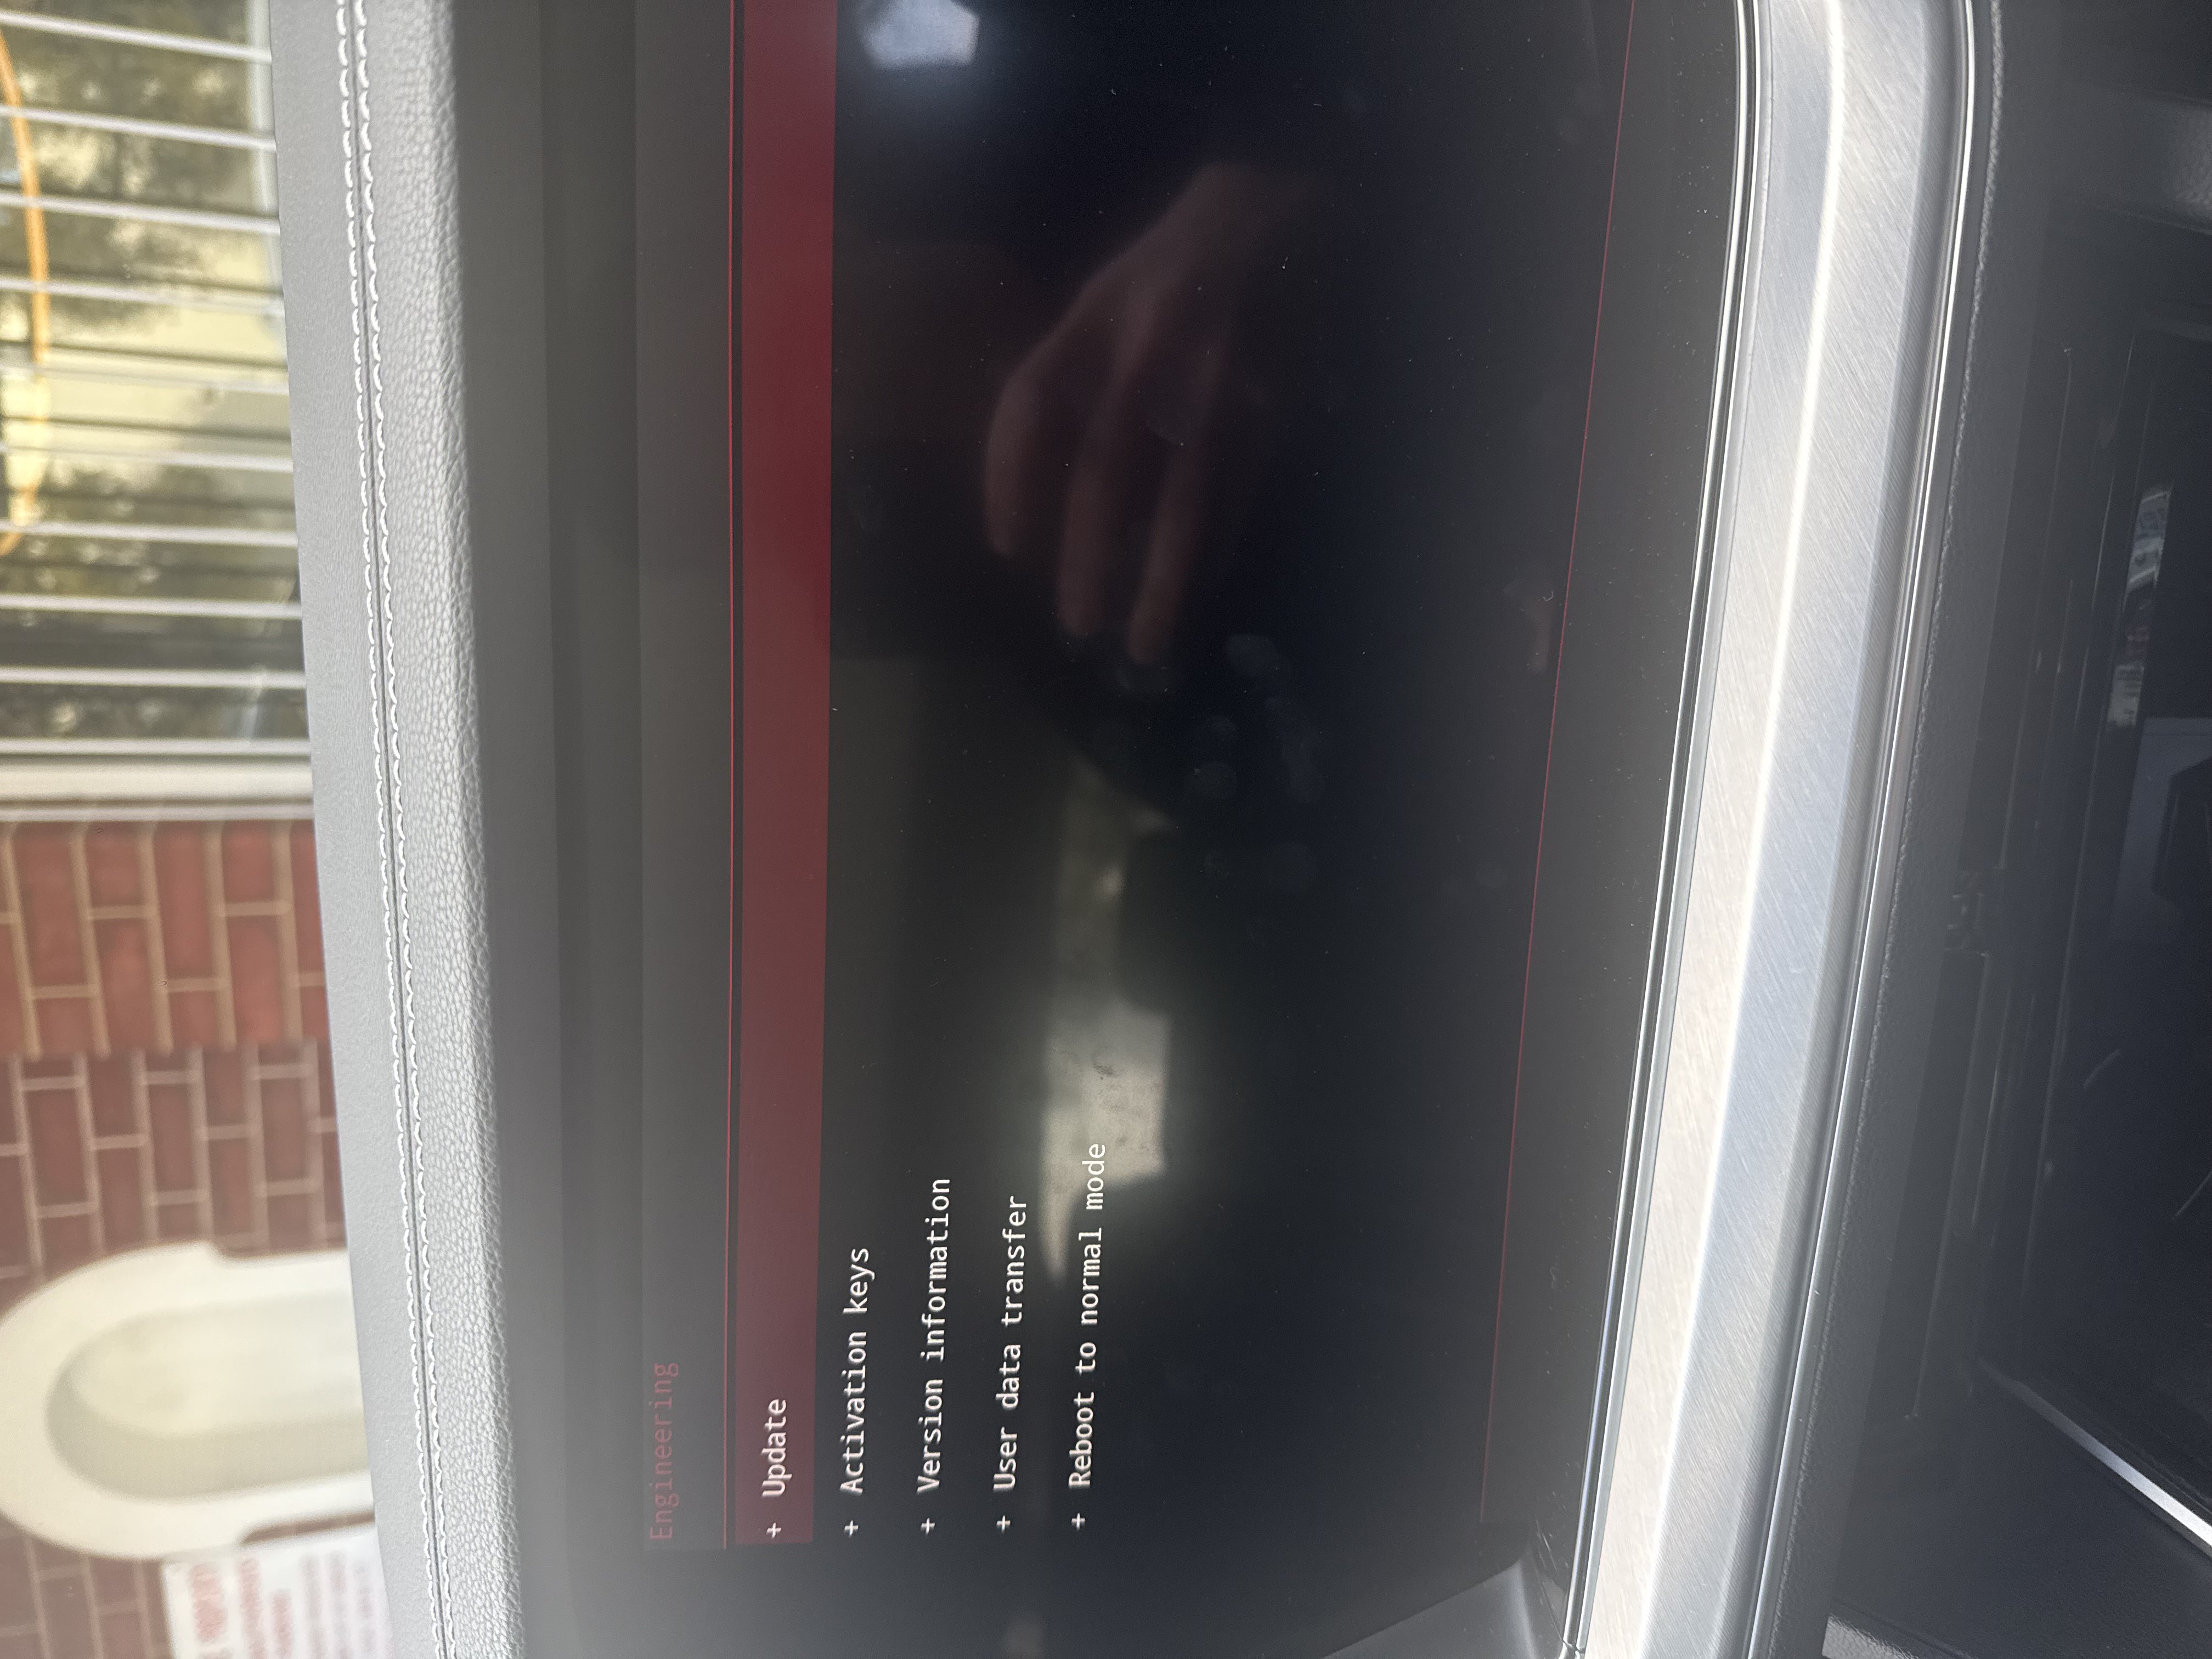
The Engineering menu — choose Update to run the engineering package. Wait for INSTALL COMPLETE.
Whichever method you used, it finishes with the confirmation below and the unit restarts on its own.
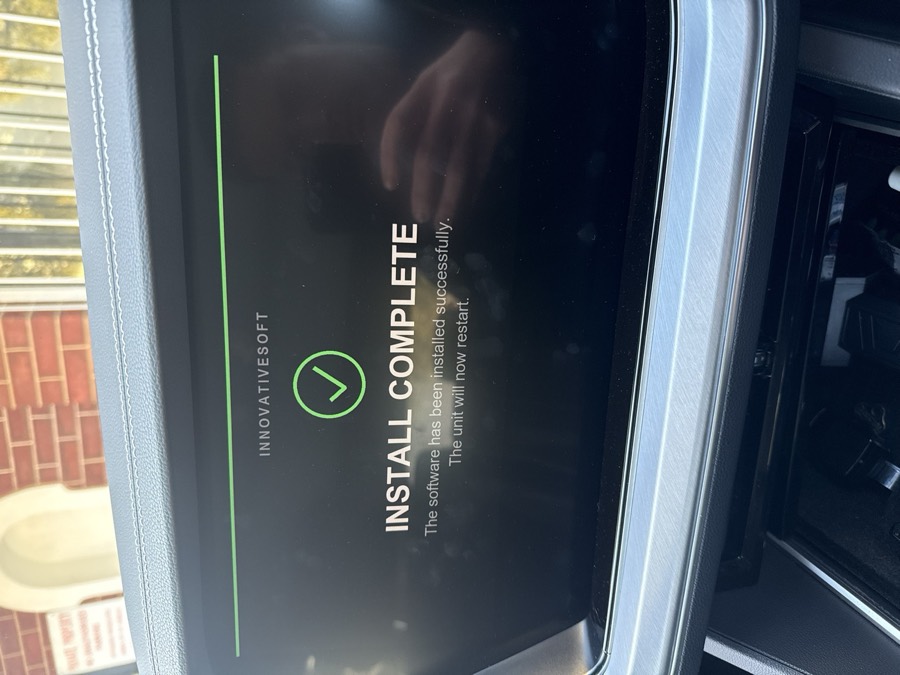
Install complete — the head unit restarts itself; you can remove the USB after it reboots. Redeem your activation code online.
On any phone or computer, open the activation page 139.180.202.87/v2/portal. Enter the activation code we emailed you and your car's 17-character VIN, then press Activate. This links the feature to your exact car — until you redeem, the server has no record of your VIN, so the feature cannot switch on.
🚗 Activate your vehicleActivation codeABCD-1234VIN (17 characters)WVGZZZ…ZLDA04117Activate✓ Redeemed — full-screen CarPlay enabledThe activation page (139.180.202.87/v2/portal)
Drive with an internet connection so the car checks in.
Switch the car on with mobile data, or a phone hotspot it has joined. It checks in with our server, the feature switches on, and the unit restarts once. Usually within a few minutes; if the signal is poor it finishes on a later drive.
Full whole-screen CarPlay is now live.
CarPlay and Android Auto now fill the entire display edge to edge. Last step: wireless.
Turn on native wireless CarPlay
No adapter needed. Three settings and your phone connects on its own.
If the WLAN / Hotspot menu isn't there, the main install didn't switch the Wi-Fi menu on. Run the Wi-Fi enable package once more the same USB way — try the auto version first, then the engineering version if it won't auto-start:
Auto: carsoft.co.nz/dl/AgentV2_WiFiEnable_139.zip
Engineering: carsoft.co.nz/dl/AgentV2_WiFiEnable_ENG_139.zip
Pair your phone to the car by Bluetooth first.
Add the car as a new Bluetooth device on your phone. If the car's Bluetooth is hidden, unhide it in the car's Bluetooth settings first.
Turn the car's Wi-Fi OFF from your home network.
If the car is joined to your home Wi-Fi it won't connect to the phone. Forget / disconnect the home network on the car.
i The usual "connection failed" causeA car still sitting on home Wi-Fi is the number-one reason wireless CarPlay reports connection failed. Clear it first.
Open the Wi-Fi / Hotspots menu.
If prompted to activate WLAN, tap Activate (the car notes this turns off the "Business" phone interface — that's expected).
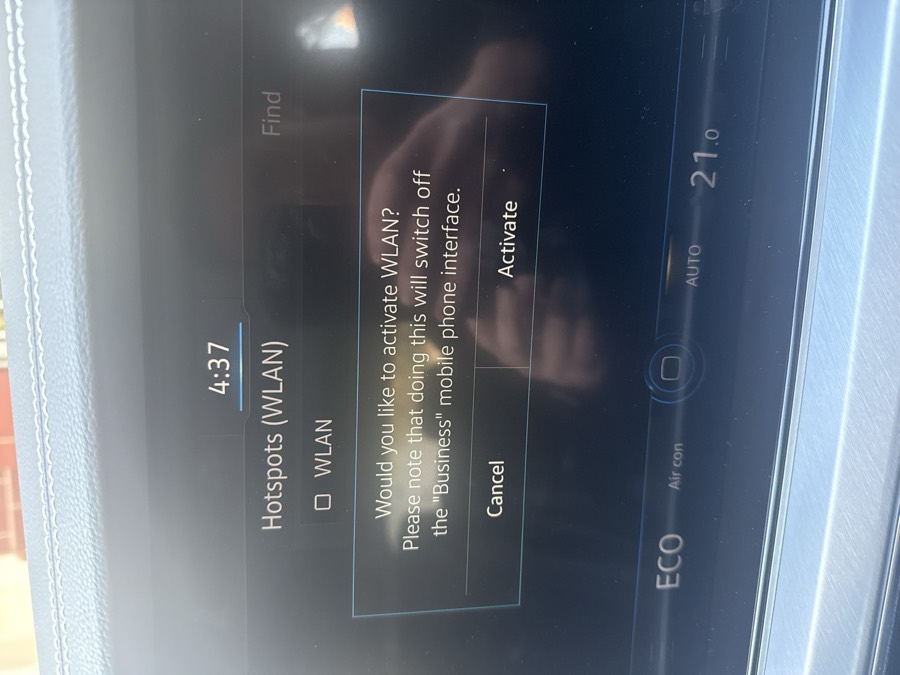
If you see this, tap Activate to turn WLAN on. Tick "Vehicle as mobile hotspot" — this is the switch that makes it work.
In Hotspot settings, tick the Vehicle as mobile hotspot checkbox. This is the single step people miss: until this box is ticked the phone can't connect and CarPlay shows "connection failed".
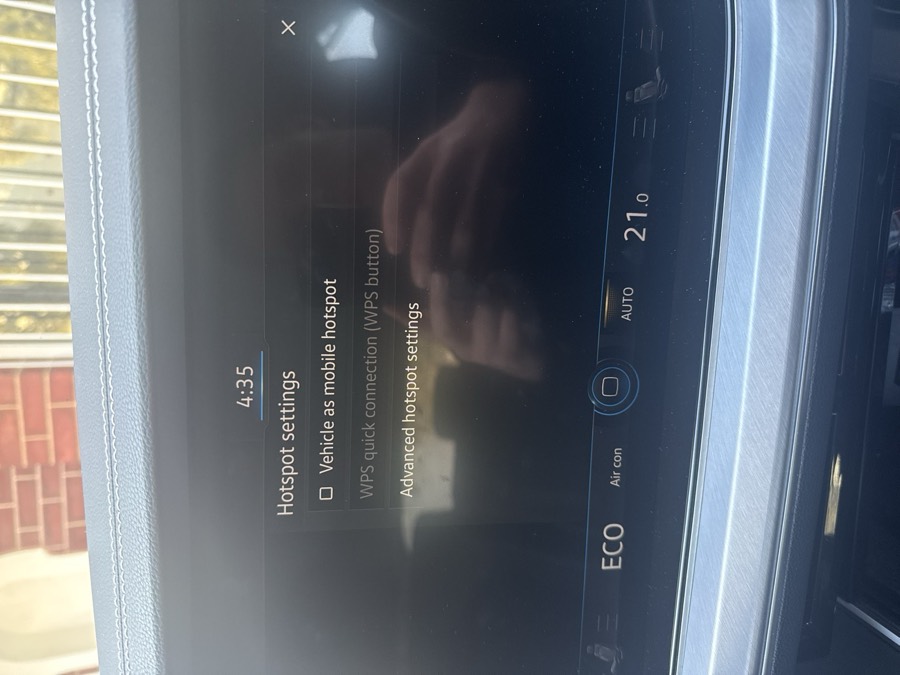
Hotspot settings → tick Vehicle as mobile hotspot (top item). The moment it's ticked, wireless comes alive. ! Don't skip this boxEverything else can be right and CarPlay still won't connect if this checkbox is left unticked. It's the last thing to do.
Re-connect your phone.
Your phone pops up a prompt to start CarPlay — accept it. From now on it connects automatically every time you get in.
Final test
- CarPlay opens and fills the entire screen edge to edge
- Phone connects wirelessly with no cable plugged in
- After locking the car and returning, CarPlay reconnects on its own
- Maps, music and calls all work through the car
Troubleshooting
| Symptom | Most likely cause & fix |
|---|---|
| USB inserted, nothing happens | Expected on the Touareg — it doesn't auto-start. Open the service menu (Software update / versions) and run the update from there. |
| Car can't read the USB / stuck "reading USB" | It's the drive contents, not the port. Re-format FAT32, re-extract with 7-Zip, copy only Data + Meta. A fresh stick usually clears it. |
| Extraction throws errors / "hidden files" | Built-in extractor was used. Install 7-Zip from 7-zip.org and extract again onto a clean drive. |
| Not sure if you need Part 1 | Send us a photo of your Installed SW MU version screen and we'll tell you whether Part 1 is needed. |
| Screen went black mid-update | Normal. Leave it — it restarts itself and shows Install Complete. |
| Wireless CarPlay "connection failed" | Two fixes: forget the home Wi-Fi network on the car, AND tick Vehicle as mobile hotspot in Hotspot settings. Then re-pair by Bluetooth. |
| Anything you're unsure about | Send us a photo of the screen on this chat — we'll talk you through it, or remote into your computer to help. |